Camping in the wilderness can be a thrilling and rewarding experience. Still, it also requires proper planning and preparation—one of the essential things to consider when camping is shelter. A shelter can protect you from elements like rain and wind and provide security. However, not all camping locations have trees to set up a shelter, which can be a problem. This article will explore how to make a tarp shelter without trees. Whether you’re an experienced camper or just starting, these methods are easy to follow and will help ensure a comfortable and safe camping experience.
Reliable Tarp Shelter Without Trees
First Stake:
Insert the tent’s first stake into a grommet before or outside the tent. The grommet is around 3-4 inches in thickness. Drive the stake into the ground to ensure straight edges on the sides of your tent for safety.
Position the Pole:
Position the tent pole in its proper place. Even though the framework is not yet complete, the system should remain stable and secure in its current state. The pole may gradually sink into the ground when pressure is applied, but it is acceptable. Make slight adjustments if necessary, as it is only temporary.
Secure the Poles:
When using a tent pole, ensure it is sturdy and strong. Measure and determine the length and position of the pole around a foot away. Confirm the poles are firmly anchored in the ground, even if they are close to the ground.
Back Stakes:
Insert the stakes for the back of the tent. They should be straight and simple. This will keep the tent straight and the sides securely anchored to the ground. Three sides of the tent should be set up, making it a logical next step.
Secure Your Stakes:
Once everything is in place, inspect the setup for stability. After constructing the shelter, test its stability by lying underneath the structure. Tarps are an essential part of building a secure and efficient tarp enclosure and an invaluable camping tool. One of the significant benefits of using these tarps is their lightweight nature, making them perfect for summer day trips.
Place Your Pole:
Installation of the tent holder will take some time. It serves as the entryway into the temporary survival shelter of diamond frame tents.
Tarp Shelter Configurations
Different methods of tarp shelter setup are available, depending on the conditions and the level of protection desired.
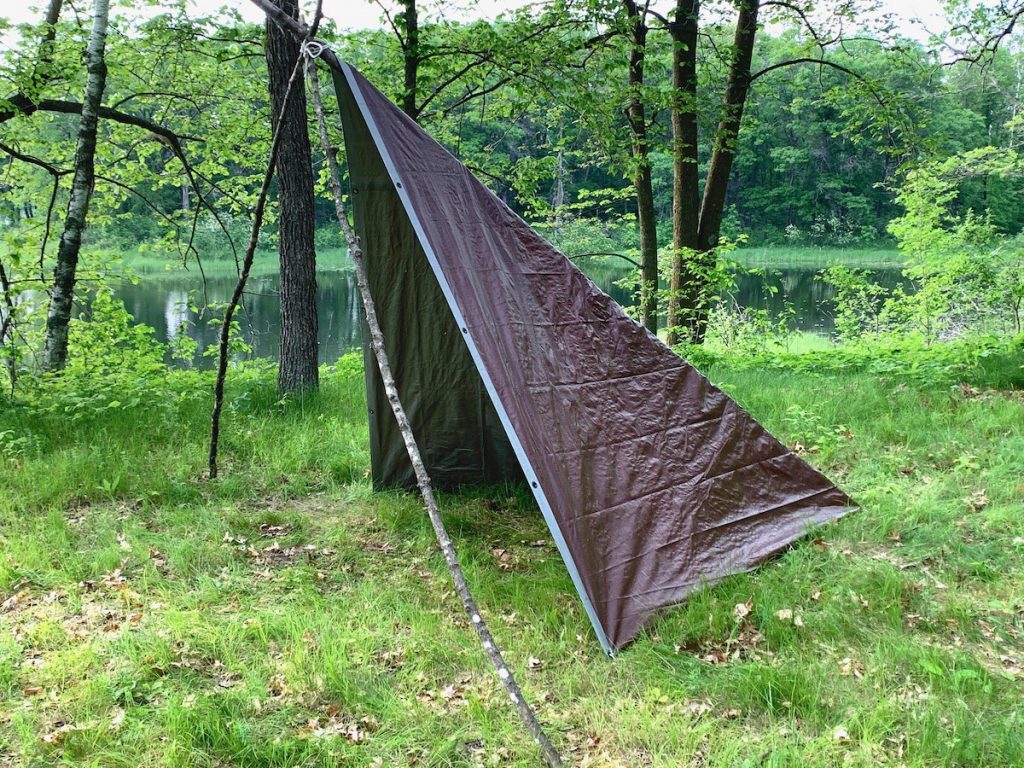
Diamond Frame Tarp Shelter
How can I construct tarp shelters without trees? Can you create a diamond framework with a front entry with three enclosed sides for the safety of the weather? You can build a tarp shelter without trees in several ways, but if you follow these instructions, you can do that quickly!! The following steps must be followed for the diamond frame tarp shelter setup. This pole provides an entrance to the shelter. Ensure your pole is on your back to stop it from falling off.
The Diamond Frame Tarp Shelter is great for camping in open areas without trees. Here’s how to set it up:
- Lay the tarp on the ground, ensuring it is large enough to cover the area you plan to sleep.
- Then, place one pole in the center of the tarp, with one end resting on the ground and the other supporting the roof’s peak.
- Use the guy ropes to secure the tarp’s corners to the ground, creating a peaked roof.
- Place another pole on the back side of the tarp, about 1/3 of the way from the top.
- Use the guy rope to secure the back pole to the ground, creating a diamond-shaped frame.
- Finally, secure the front end of the tarp to the ground, creating a closed-end shelter with a front entrance.
One pole tarp shelter – Closed-End A-Frame
The Closed-End A-Frame shelter is a simple and efficient method of constructing without trees. Here’s how to set it up:
- First, lay the tarp on the ground, ensuring that it is large enough to cover the area where you plan to sleep.
- Next, fold one end of the tarp in half to create an A-shape. This will be the front of the shelter.
- Use the rope to secure the tarp’s corners to the ground, creating a peaked roof.
- Place a tent pole in the center of the tarp, with one end resting on the ground and the other supporting the roof’s peak.
- Tighten the rope to create tension on the tarp and secure it to the ground using stakes or tent stakes.
- Finally, secure the back end of the tarp to the ground, creating a closed-end shelter.
This shelter is easy to set up and provides good protection from rain and wind. It’s an excellent option for camping in open areas without trees.
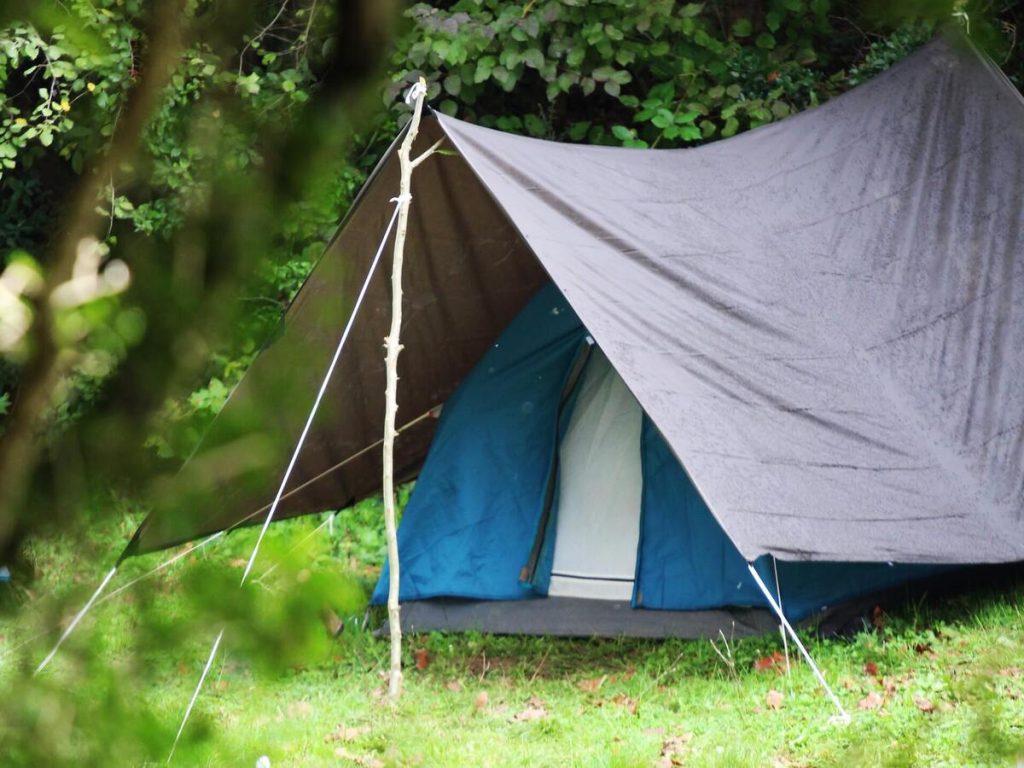
Two pole tarp shelter – A-Frame
An A-frame design would be perfect when two poles are used to install tents. The configuration looks like a traditional tent setup, only raised off the ground. It will require the tight pulling of your mantel and your poles angled at the right height.
Two-pole tarp shelter A-Frame is a versatile shelter that can be set up with just two tent poles, four tent pegs, a guyline, and a tarp.
Here’s how to set it up:
- To start, determine the size of your tarp and set up poles 30 cm outside its edges.
- Ensure the poles are secure and at least 5ft (152 cm) off the ground for proper shelter.
- Next, use the rope to create a tight line. Adjusting the tent poles until the rope is tight may take some time.
- Secure the rope to both ends of the poles, aligning the knots and maintaining the desired shelter height.
- Once the rope is set up, place the tarp on the line making sure it’s centered and stable.
- To secure the shelter, stake the tarp to the ground and ensure it is tight and durable.
- Add more pegs if necessary.
- To optimize the tarp shelter, place the longer side of the shelter to face the wind, as both ends are exposed to the wind. This will help reduce wind force and prevent the cover from becoming a wind tunnel.
Why should I use a tarp over my tent?
The use or protection of a tent tarp protects your camping sites. This is particularly helpful for camping with bivvy bags.
Shelter from the wind
Similar to what is said here, using tarps for protection from winds can be an effective solution for a tent. It’s particularly useful when a person needs more confidence about the strength of their tent. It has one disadvantage: your wind will blow it depending on what you buy. To prevent this:
- Keep a loose tarp in place as far as you can so that it reduces impact.
- Do not lay the surface entirely in the wind, as it could lead to the tarp pulling off the ground.
- Make the tent more stable by letting the wind travel through.
Shelter from the rain
Install tarps over your camping tent is a simple solution. If the waterproofing is not right on your tent, you may need an extra layer to cover it. If the rain does not land on your tent, the polyethylene that covers it is wet. Let’s take a moment to consider this. It will also be possible for the tents to be wet and they will be dry to put out the following day. It’s all about winning.
FAQs
What Kind of Tarp Do You Need?
The most effective tarp is the polyethylene tarp. We constantly say this, but poly is ideal for sheltering due to its waterproofing qualities. Often poly tarps have an additional waterproof coating. Polyethylene tarps can also be used in shelters for many other reasons.
Can A Tarp Withstand A Lot Of Wind?
Yeah! A tarp is resistant to wind and moisture. A tarp needs much wind to slit holes, so the stake cannot be moved without a solid foundation. An adequately installed tarp can withstand winds up to 60 km per hour.
Should You Put a Tarp Over Your Tent?
I have never had an uncomfortable experience in a dry campsite. Is putting an awning on my tent an option? Both sides have advantages. A tent cover can dry out your tent if the weather turns cold. It provides insulation for warmer days. However, tent tarps can be heavy or incredibly awkward and damage you if you don’t use them properly.
Ultimately, the choice between covering a tent depends on weather conditions. A tarp can make a camping trip more pleasant and comfortable. When camping, we’ve never really got to bring them around.
Helpful Tips:
Become Familiar With Your Knots
To construct the structure effectively, you must have special knotting skills when hanging tarps on tents.
Several knots are commonly used when setting up a tarp shelter, including:
- The Taut-Line Hitch: This knot adjusts the tension on a tarp rope. It is easy to adjust and can be easily undone when needed.
- The Clove Hitch: This knot attaches a rope to a tree or other anchor point. It is easy to tie and untie but can slip incorrectly.
- The Square Knot: This knot is used to tie two ropes together. It is strong and reliable but can be difficult to untie if it is under tension.
- The Bowline: This knot creates a loop in a rope, which can be used to attach the tarp to a tree or other anchor point. It is secure and easy to tie but can be difficult to untie if it is tense.
- The Trucker’s Hitch: This knot creates a mechanical advantage, allowing you to pull a rope tight with minimal effort. It is useful when securing a tarp in windy conditions.
Other essential knots include the odd knot, two round twisting knots, and the half hitch knot.
It’s important to practice tying these knots before heading out on a camping trip to tie them quickly and easily in the field. It’s also important to ensure you know how to untie them so you need to adjust or take down the shelter.
Never Leave Your Tarp With A Flat Place
If your tarp is placed over your tent, ensure it remains at a maximum angle. Because the tarp is placed flat on the end, it will absorb excess moisture. You won’t have to wait a long time to remove the nails. Therefore it would help maintain an inclined angle to have an efficient structure of tarps.
Stay Safe!
Also Read: